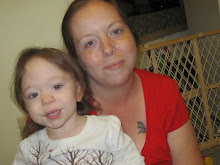
I have been wanting to try photo transfers for so long. I bought my mod podge photo medium transfer about 2 months ago. It's just been sitting here waiting for me to do something with it. You have to print your pictures on a copier, a laser. Don't do inkjet, that's typically your printer you use at home. Go to office depot, office max or staples to have your pictures printed. And just print on regular 20# paper. Oh and the bottle mentions that you cannot use original photos. This is printed photos from a photo lab. Also if you are printing words you have to invert your photo so when you transfer it will be read the right way. I inverted all my photos just because I knew I would know they were backwards if I didn't. That might be an ocd thing.
So I printed my photos on a laser printer and then trimmed them out. I found my wood pieces at michaels. They were really cheap and already sanded and stained on the sides.
Take your picture and apply an even coat on the front side of the photo. I used a good medium thick coat and then placed the photo on the wood piece. My picture I left slightly bigger than the wood so I got full coverage on the wood piece. Then I used an extra piece of wood and made sure the photo was evenly and all air bubbles were pressed out. You can also use a brayer if you have one. I have one and was just too lazy to go pull it out.
Let them fully dry. It has to be completely dry before you can do the next step. I let mine dry overnight. I did check on them about 8 hours in and they seem completely dry but decided to wait until 24 hours.
So this morning I started with a wet rag on my transfers, let me add it was damp. You want all the paper wet so it will start to loosen. Rub the paper off with the rag. I was real easy with the first transfer piece and then I found my groove. You will notice that one layer comes off and your left with a thin layer of white paper. I was doing 7 pieces so I moved on to the next and let that one dry. When I went back to the first one I rubbed little fuzzies off. I was still left with minimal fuzzies.
When I was done with all they still looked covered with paper, I noticed on one that it was starting to take the photo color off so I decided I was done with removing the paper.
I took sand paper and sanded the edges slightly. Sanding removed the overhang of paper and the photo transfer solution that dried. When dried it was like a spongy piece of latex. After sanding I used an inkpad to grundge the edges.
My next step was I let them all fully dry and it didn't take long at all. Then I put mod podge gloss on as a top coat. I was really worried that would still see the minimal fuzzies. When the mod podge dried they were perfect. I do despise mod podge though because it always seems tacky feeling and its difficult to get all the brush stoke lines out. I plan to invest in some krylon clear coat for my next project.
I love them and really cant believe how they turned out.


0 comments:
Post a Comment